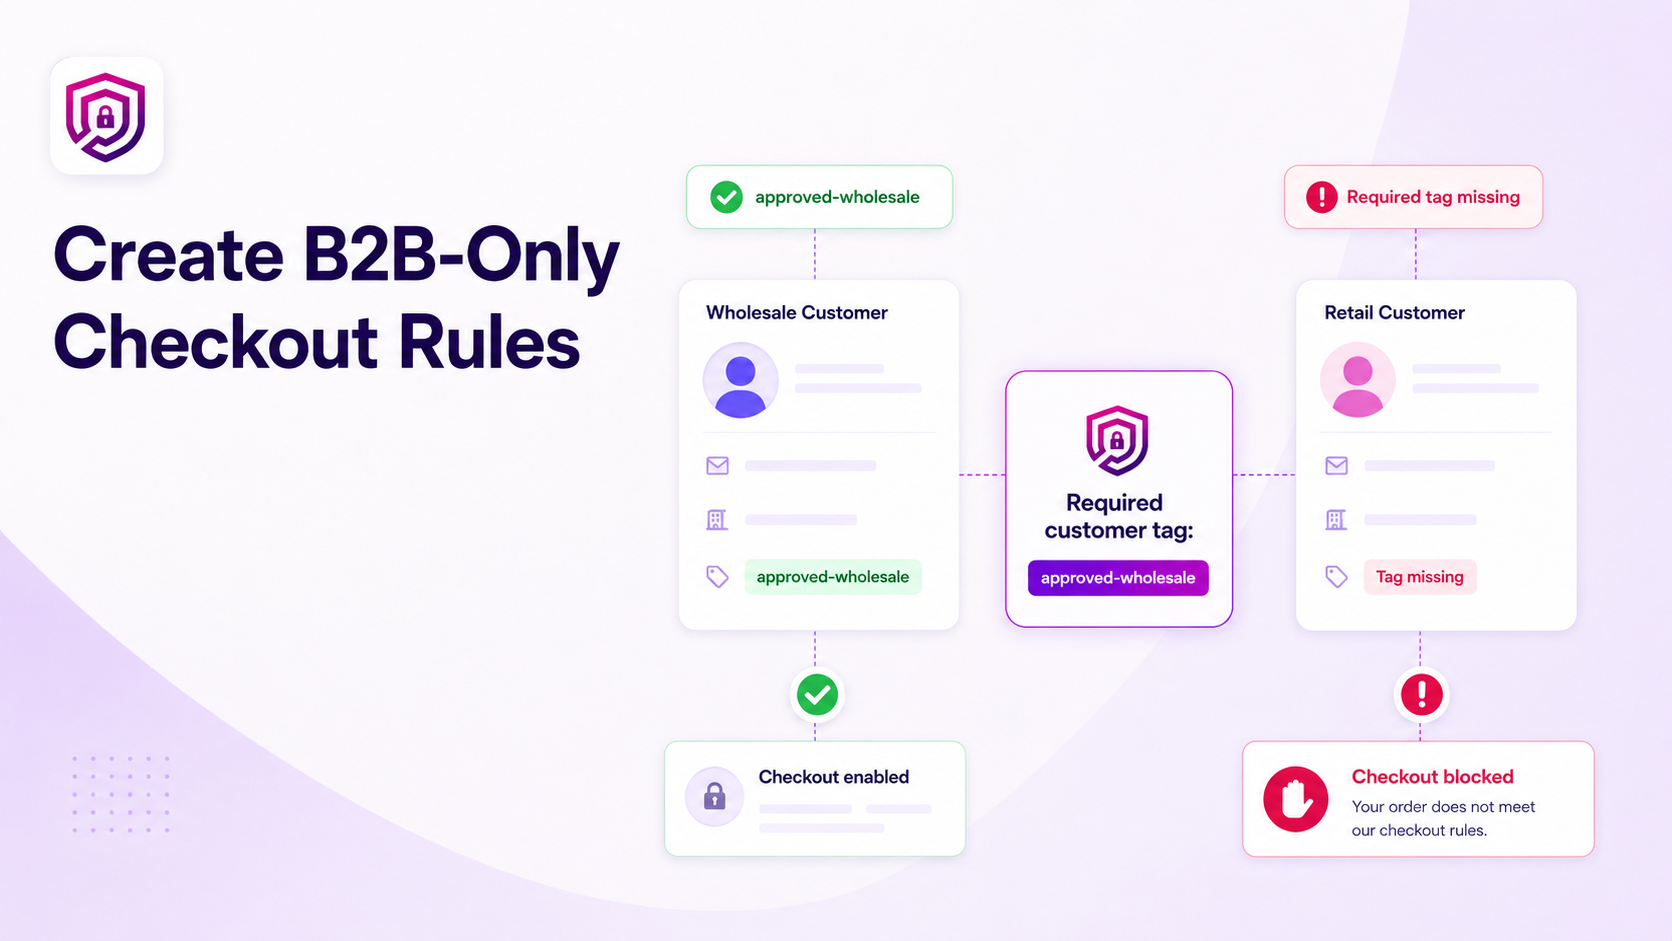
Wholesale pricing and products are often intended only for approved business customers.
But showing a wholesale collection or applying a discount is not always enough. Merchants also need to ensure that only authorised buyers can actually complete checkout — not just view or add items to a cart.
Common B2B Access Problems
Wholesale channels that are not properly gated create predictable problems:
- Retail customers reaching wholesale products — anyone with the right URL can access trade pricing
- Unapproved buyers using wholesale links — links shared between colleagues or posted publicly allow unverified buyers to check out
- Discount-code leakage — wholesale discount codes circulate outside the intended audience
- Customers checking out without required verification — new accounts that have not been reviewed can complete a wholesale purchase
- Manual review of wholesale orders after payment — merchants discover the problem after the order is paid and fulfilment has begun
Each of these is a downstream consequence of missing validation at checkout.
How Customer-Tag Checkout Validation Works
Shopify allows merchants to assign tags to customer accounts. These tags can represent any status, segment or attribute — for example, approved-wholesale, trade-account or b2b-verified.
During checkout, OrderGate can verify that the logged-in customer carries a required tag. If the tag is present, checkout continues normally. If the tag is missing, checkout is stopped and the buyer sees a merchant-configured message.
This means the validation runs at the point of purchase — not just at the point of accessing a product page or applying a code.
Example customer tag: approved-wholesale
The buyer must be logged in for the tag check to work. Guests cannot be verified by tag, so requiring login is a necessary part of this workflow.
Recommended B2B Workflow
A well-structured B2B access workflow typically follows these steps:
- Customer submits a wholesale application — via a form, email or third-party onboarding tool
- Merchant reviews the application — verifying business credentials, trading history or any other qualifying criteria
- Approved customer receives the required tag — a team member adds the tag to the customer account in Shopify admin
- Tagged customer accesses wholesale pricing or products — using a trade-only collection, a discount code or a customer-group price
- OrderGate confirms the tag during checkout — before payment, the validation checks that the logged-in account carries the required tag
- Untagged customers receive instructions — the rejection message explains how to apply or contact the merchant for access
This keeps the access workflow clean and auditable. Approval is a deliberate action, not something that happens automatically.
Example Rejection Messages
Write rejection messages that are helpful, not just restrictive.
Wholesale checkout is available only to approved business customers. If you have a trade account, please log in. If you would like to apply, please contact our team.
Your account has not yet been approved for wholesale ordering. Please contact us for assistance.
Avoid technical language. The buyer should understand what they need to do next without having to contact support to find out.
Important Operational Considerations
A few practical points to keep in mind when setting up this workflow:
- Require customer login — tag-based validation only works when the buyer is logged in. Guest checkout bypasses customer tag checks
- Use one consistent approval tag — mixing multiple tag names creates gaps where approved customers may be incorrectly blocked
- Document who can add or remove tags — establish a clear internal process for approving and revoking access
- Test with two customer accounts — one with the required tag, one without — to confirm both outcomes work correctly
- Avoid exposing internal tag names in the rejection message — buyers do not need to know the exact tag name used internally
How to Configure the B2B Rule
- Choose B2B customer-tag validation in OrderGate
- Enter the required Shopify customer tag — use the exact tag as it appears in Shopify admin
- Add the rejection message — write a helpful explanation for buyers who are not yet approved
- Save and activate the rule
- Test with two accounts — a tagged (approved) account and an untagged account — to verify both outcomes
Related Articles
- How to Block Risky Shopify Checkouts Before Payment
- How to Set Minimum and Maximum Order Limits in Shopify
- How to Add Age Verification and Terms Acceptance to Shopify Checkout